Native ads provide individual ad components that you implement directly in your app’s layout, unlike other formats where the SDK provides the complete ad view.Advantages: Customize the layout to match your UI/UX and minimize visual disruption.Requirements: Include an ad indicator and maintain visual differentiation to prevent users from confusing ads with content.
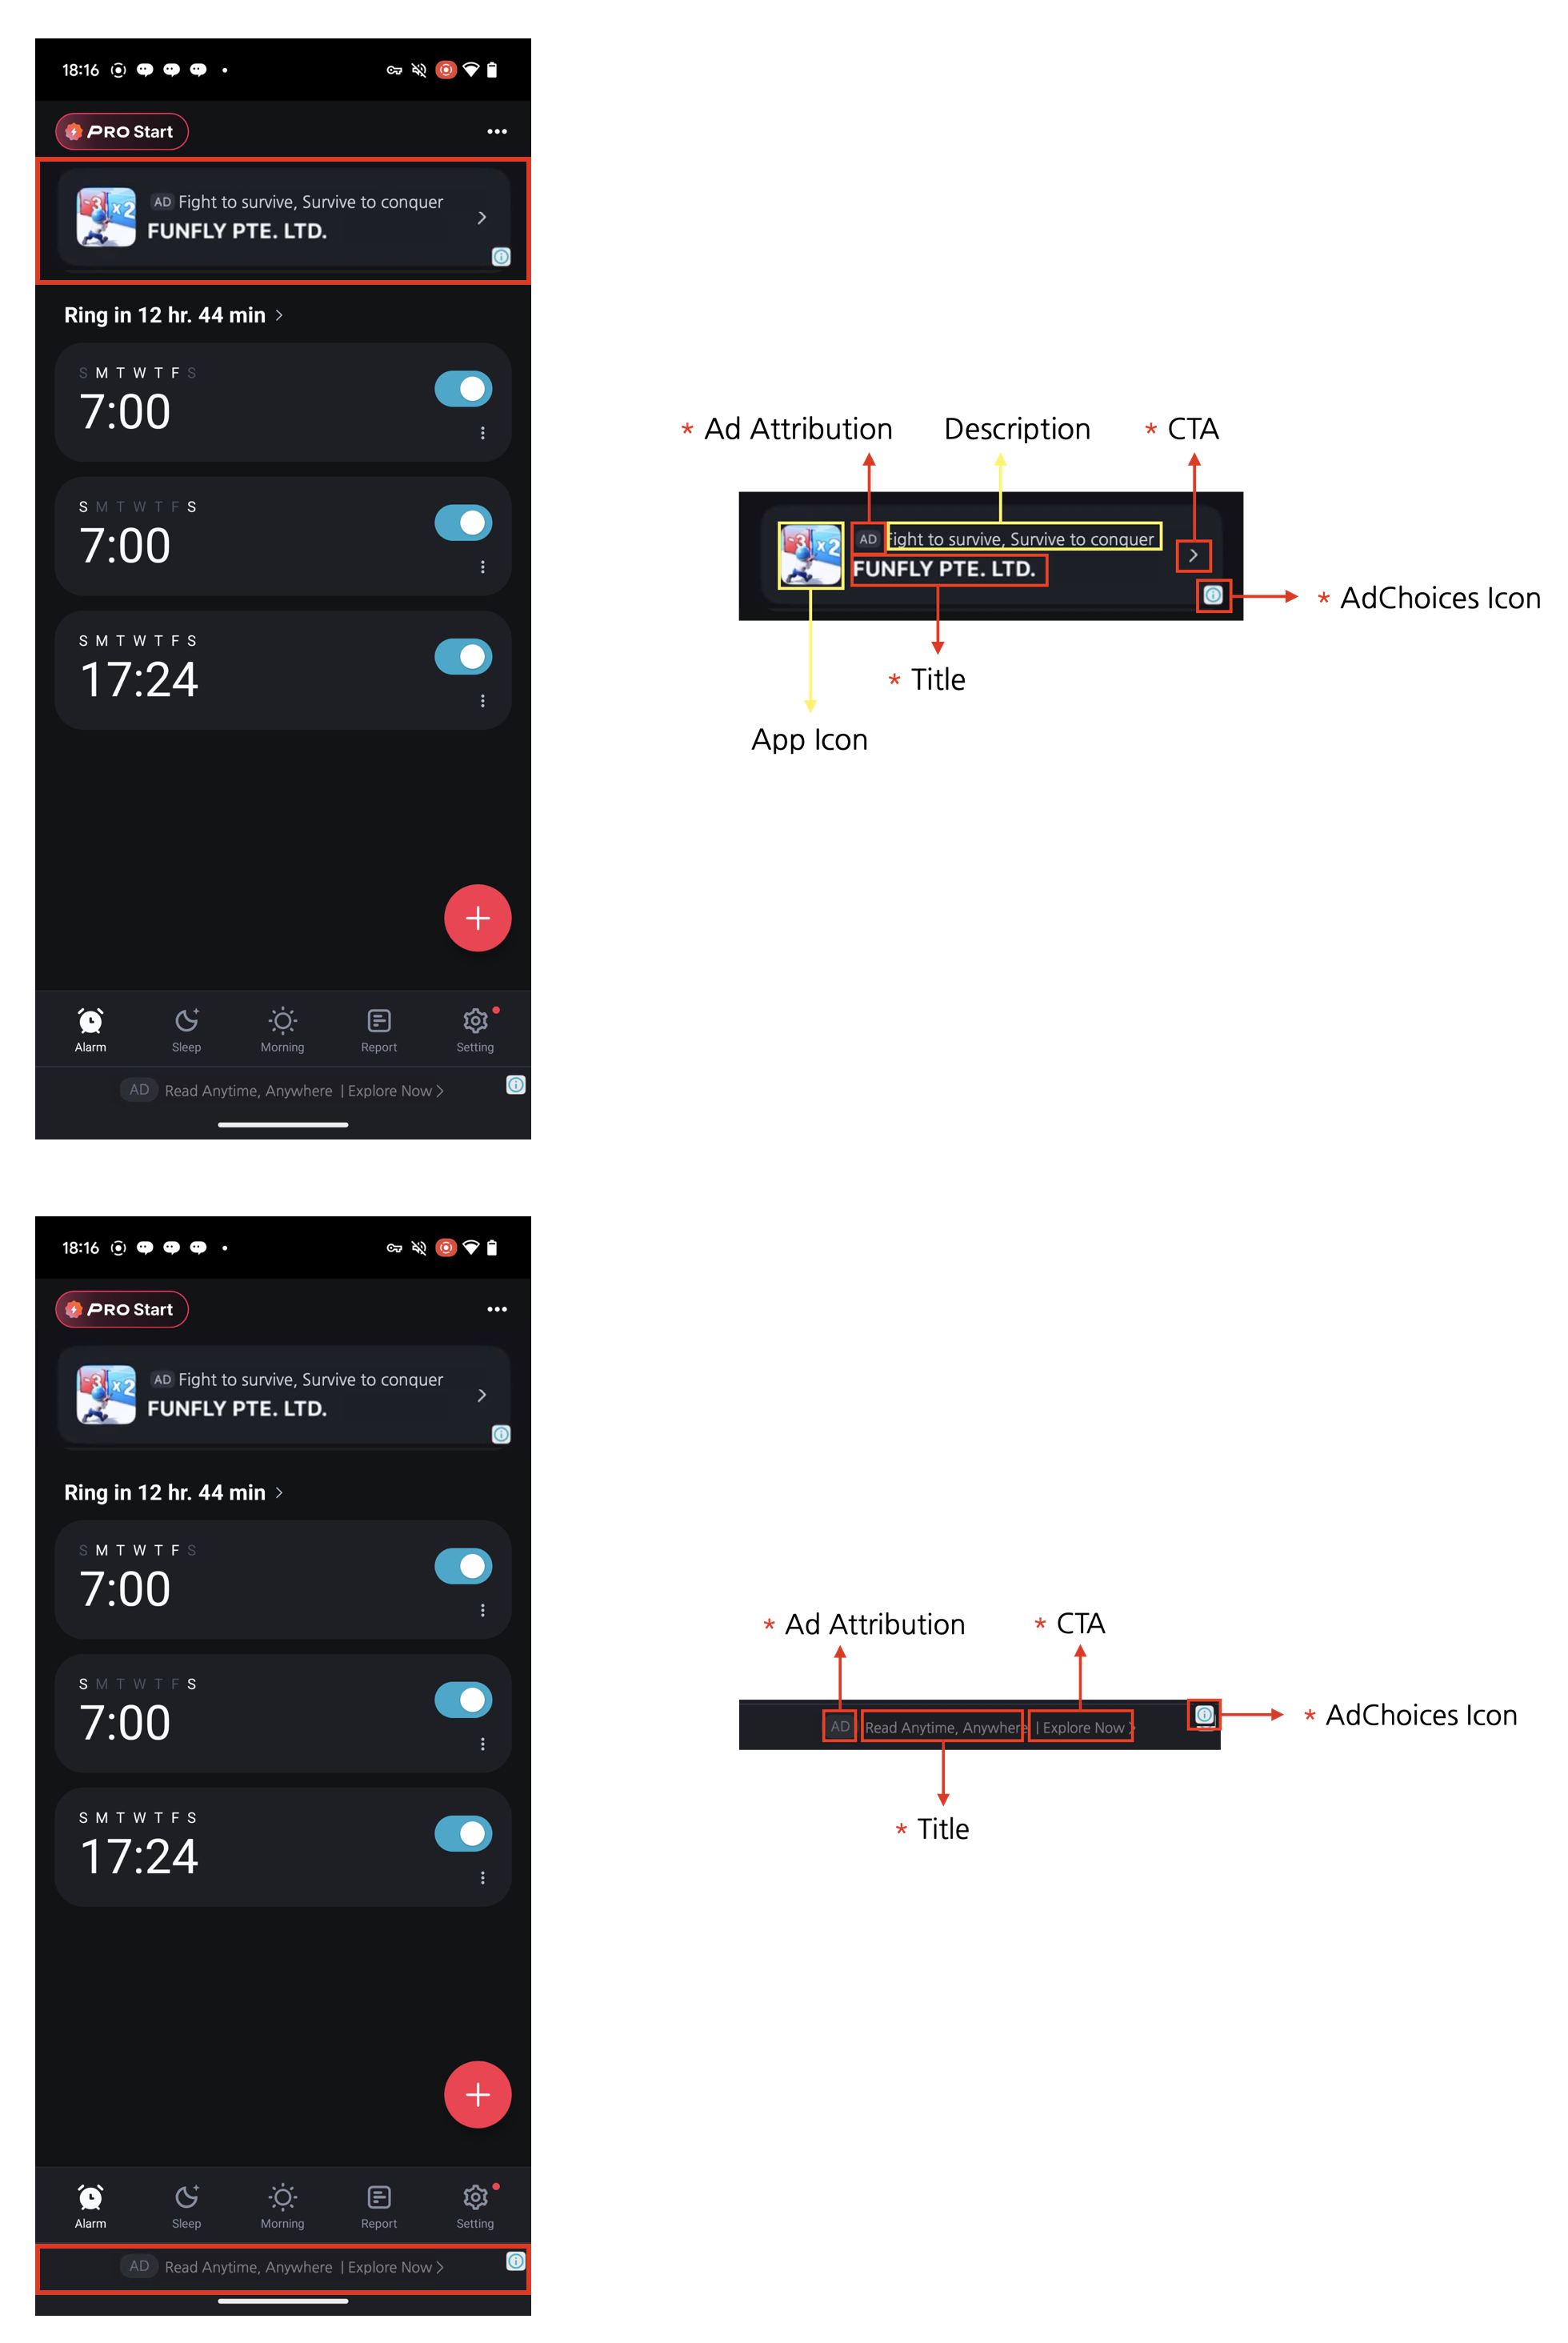
Four Required Elements for Native AdsNative ads can be designed to complement the content and look of your app. However, the following four required elements must be included. These elements are necessary to clearly mark native ads as advertisements so that users don’t mistake them for content, and to ensure the minimum advertising effectiveness expected by advertisers.
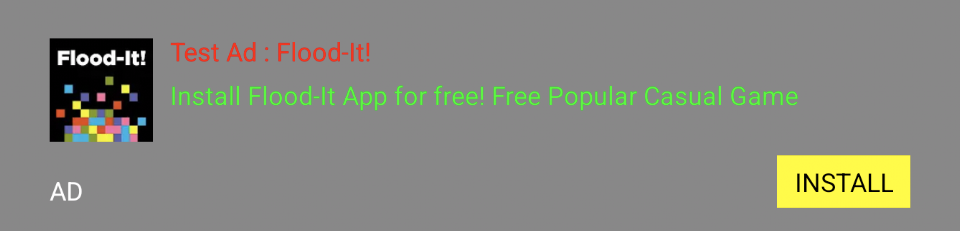
Ad attribution: You must clearly display ad attribution text such as “Ad”, “Advertisement”, or “Sponsored” (localized appropriately) in the ad area so users can clearly identify the content as advertising.
AdChoices icon: The AdChoices overlay icon enables users to identify and control ads, typically displayed as an ’ⓘ’ icon. This icon is automatically added by the DARO SDK, so no separate implementation is required. It is placed in one of the four corners of the ad view (top-left, top-right, bottom-right, bottom-left), with bottom-right as the default. For Non-Reward apps using Manual Implementation(XML), you can pick the corner via DaroNativeAdBinder.Builder.setAdChoicePlacement() (see the AdChoices placement section below). Please lay out your ad view so the selected corner is not overlapped or obscured by other UI elements. The icon’s appearance and behavior may vary depending on the ad source (demand).
Title: The ad title must be displayed.
CTA (Call to action): A CTA button with text such as “Install”, “Open”, or “Download” must be included. The size and format of the button can be freely configured, and it can be replaced with a text field depending on the situation. Since the ad source (demand) provides the CTA text, there is no need to specify fixed wording.
val adBinder = DaroNativeAdBinder.fromTemplate(
    context,
    DaroNativeAdTemplate.Banner(
      ...
    )
  )
2
Create adUnit
  val adUnit = DaroNativeAdUnit(
    key = ${AdUnitId},
    placement = ${placement}, //Name displayed in logs. Can be left empty.
  )
3
Create adView and add to view
val adView = DaroNativeAdView( context = context, adUnit = adUnit)binding.adViewContainer.addView(adView)
4
Set adBinder on adView
adView.setAdBinder(adBinder)
5
Set listener
adView.setListener(object : DaroAdViewListener { override fun onAdImpression(adInfo: DaroAdInfo) {} override fun onAdClicked(adInfo: DaroAdInfo) {} override fun onAdLoadSuccess(ad: DaroViewAd, adInfo: DaroAdInfo) {} override fun onAdLoadFail(err: DaroAdLoadError) {}})
6
Load ad
adView.loadAd()
You must set adBinder before calling loadAd().
When you declare a view, it automatically detects the appropriate lifecycle for the screen and manages its behavior. You don’t need to manually call resume, pause, or destroy.
If you set autoDetectLifecycle to false (default: true), you must manually call resume, pause, and destroy.
DaroNative( adUnit = DaroNativeAdUnit( key = ${AdUnitId}, placement = ${placement} ), listener = object : DaroAdViewListener { override fun onAdImpression(adInfo: DaroAdInfo) {} override fun onAdClicked(adInfo: DaroAdInfo) {} override fun onAdLoadSuccess(ad: DaroViewAd, adInfo: DaroAdInfo) {} override fun onAdLoadFail(err: DaroAdLoadError) {} }, modifier = Modifier) { DaroNativeAdTitle { title -> Text(title) } // for title DaroNativeAdBody { body -> Text(body) } // for body DaroNativeCallToAction { callToAction -> Text(callToAction) } // for callToAction DaroNativeIcon(modifier = Modifier.size(40.dp)) // for ImageView DaroNativeMedia(modifier = Modifier.size(100.dp)) // for MedaiView}
You can preload ads without creating an ad view using the DaroNativeAdView.requestPreload() method.
This option is only available for Non-Reward apps via the Manual Implementation(XML). Template and Reward apps use the default value.
For Reward apps, calling setAdChoicePlacement() does not actually change the AdChoices icon position.
Behavior varies by demand source (preferred, not guaranteed)setAdChoicePlacement() asks the demand source to place the AdChoices icon at the specified position. However, where it actually appears is decided by each demand source, so the requested position is not always honored.Demand sources may respond differently:
Some demand sources honor the requested position as-is.
Some demand sources ignore the request and use their own fixed position.
Some demand sources replace the AdChoices icon with their own ad indicator (such as an ad badge).
In every case, the relevant ad compliance requirements are satisfied.Therefore, when designing your ad layout, assume the AdChoices icon or ad badge can appear in any of the four corners and reserve sufficient padding around each corner.